Sunday, December 28, 2008

Paton's Pooch Neck Warmer


This neckwarmer couldn't be easier to make. Simple Garter Stitch. This is made flat, not in the round.
Main Blog Page http://www.knitting2008.blogspot.com/
My ETSY Store: http://heatherg23.etsy.com/

Friday, December 12, 2008

Scarf's Bernat Soft Boucle


2 BOUCLE SCARFS

These are 2 scarfs that can be made very quickly. They can be made in about 3 hours. I used US size 13 needles. Casted on 18 stitches. The finished size is 6 1/2 in by 50 in. The names of the yarn were "Mauve Shades" purple scarf to the left and "Beautiful Blue" to the right. I used Bernat Boucle Yarn that can be found at Michael's.

I did simple garter stitch. You can either knit every row or purl every row.


Friday, December 5, 2008

Open Rope Cable Twists


Open Rope Cable Twists Knit Pattern

Measures 6 x 9 inches
CO: 28 stitches, 19 rows and 19 sts equal 4 inches. 10.5 needle used. Very basic cable instructions, nothing difficult. I used Bernat Worsted yarn.


Find Instructions HERE


Thursday, November 27, 2008

Crossing Paths

- Crossing Paths -


The cable pattern is bordered by moss stitch. It starts out as ribbing then goes into the wovan cable pattern. Very easy!
CO: 29
Height is 9 in.
Width at top and bottom is 7 in., the center is 6 in.

Thursday, November 13, 2008

Arm Warmer Pebble Blue


Pebble Blue Arm Warmer

Pebble Blue Knitted Arm Warmer

Have fun creating this beginner knitted arm warmer pattern. Just repeat the same 4 rows for as long as you want the arm warmer to be. It’s not a lace pattern but sometimes it can look like it is. The larger the needle the more there is a “lace” effect. You're basically making a rectangle and sewing the edges together. The entire pattern is below. 

When it comes to size I add 1/2 inch to the size of the wrist of the person wearing it. 

If you're looking for a challenge you can try these Cabled Arm Warmers. They include Serpentine Cable Arm Warmer, Soft Cabled Arm Warmer, "Warm Me Up" Braid Cable, Waves Arm Warmer, Slow and Easy Cabled Arm Warmer and more.

It's made flat and then the sides are sewn together.

IF you want a thumb hole see the instructions in the section "Sewing your arm warmer together" #5.

Skill Level: Beginner

CO: 25 sts

Needle Size: 11 US

Finished Size: 6 inches width. 

ABBREVIATIONS:
WYIF = Bring yarn in front, as if to purl
S1: Slip 1 stitch, as if to purl
* * = Repeat instructions between them

PATTERN:
You need an uneven number of stitches for this pattern 

Row 1: P1, * K1, P1*
Row 2: K1 *WYIF, S1, K1*
Row 3: K1 * P1, K1*
Row 4: K2 *WYIF, S1 K1*

REPEAT ROWS 1-4 as needed


FINISHING
  1. It’s important to do a loose bind off or it will squeeze your hand/arm. That's not to comfortable, trust me. I've made that mistake a couple of times.
  2. I always do a purl bind off no matter what stitch the last row is comprised of. It's so much more attractive then a knitted one. It's up to you.
  1. When you end your last row cut your yarn and leave a tail. You will tie a knot to secure the sewing and then you can weave it in.


Sewing your arm warmer together

If you have your own method of sewing by all means do that. If you need instructions then I can tell you how to sew it together.

Place the arm warmer with the right side facing down. Then take the sides and fold them in ward. Pin the top of it as you're working.

  1. Now thread your yarn needle.
  1. Start sewing by threading your needle through the purl bump closest to the edge then put your needle through the purl bump closest to the edge on the opposite side. Pull the yarn through leaving about 4 inches and tie a loose knot (so it doesn't squeeze your wrist). Then tie another knot tightly to secure the first one.
  1. Now, whatever side your yarn needle is on, **go up a little and put your yarn needle through the purl bump closest to the edge and go straight across to the other side and do the same.** repeat the instructions between the asterisks. The diagram shows how to do it.
  2. Pull tight every couple of inches.

      5. You can also pin where the thumb hole is going to be, if you want one. To do that lay it flat and slip your hand in it just like you would when wearing it. Use 2 safety pins where you want the beginning and end to be. When you get to the 1st safety pin weave the yarn into the sides until you get to the top pin and continue sewing again.

When you get to the very top do the last stitch and pull it tight, but not so tight that it hurts your arm, and tie a knot if you have a tail from when you finish your warmer.

Hope you try it sometime. Let me know if you have any questions.

Thanks!!
Heather


Wednesday, November 12, 2008

Heather's Cabled Purse


This is an easy cable patterned purse. Definetly a beginner pattern. In the pattern instructions I included video links to some techniques if you choose to do them. It's made flat, then folded in half.

Find instructions at  http://www.mediafire.com/?8vd44l8vfhafof7   Updated 3/31/12

All the instructions ca be found in that document.
Thanks!

Thursday, November 6, 2008

Double Patterned Cable Moss Stitch Pattern


This is the easiest of all cable patterns. It has a lot of moss stitch. The finished size is 6 x 9 inches. CO 24 sts. . Your using the cable needle 1 time.


.

**VIDEO:** How to do the Knit stitch:
http://youtu.be/6y-yC_qbXhc


**VIDEO:** How to do the Purl stitch:
http://youtu.be/E3wUDbhSaL4


**How to Cable-Video**

LEFT CROSS:
http://www.youtube.com/watch?v=YZYKWm0JtEI

RIGHT CROSS:
https://www.youtube.com/watch?v=xxulTZA1cLA

Tuesday, November 4, 2008

Ribbed cable stitch pattern


Ribbed Cable Stitch Pattern

You only have to use a cable needle twice on this cable stitch pattern.
CO 30
Size: 6 in x 9 inches
Yards: 30-40 yard of yarn needed.

This is a large ribbed cable with a moss border. You only need to use the cable needle twice. The only difficult thing about the cable is that it is a large cable. That makes it very tight when trying to do it. If you’re having trouble getting you needle tip into those cable stitches push up all the stitches on the right needle. That gives you more room to maneuver. The cable pattern will be below the pattern instructions.

CO: 30
Finished Size: 6 x 9 inches
Rows Completed: 44
Yards: Need about 30-40 yards of yarn


Abbreviations:
C14F = Slip 7 stitches hold in the front, k7 then k7 from cable needle
C14 rib = Slip 6 stitches hold in front, K2 P2 K2 P2 then K2 P2 K2 from the
cable needle

Moss stitch = For odd # rows = K1 P1 across the row. For even # rows = Knit the Purls and Purl the Knits

PATTERN 
ROWS 1,3,5,7,9,11,13,15,17: 5 moss, P3, (K2P2)3 times, K2, P3, 5 moss
ROWS 2,4,6,8,10,12,14,16,18: 5 moss, K3, P2 (K2P2)3 times,K3, 5 moss
ROW 19: 5 moss, P3, C14F, P3, 5 moss
ROW 20: 5 moss, K3, P14, K3, 5 moss
ROWS 21,23,25,27,29: 5 moss, P3, K14, P3, 5 moss
ROWS 22,24,26,28,30: 5 moss, K3, P14, K3, 5 moss
ROW 31: 5 moss, P3, C14 rib, P3, 5 moss
ROW 32: 5 moss, K3, P2 K2 P2 K2 P2 K2 P2, K3, 5 moss
ROWS 33,35,37,39,41,43: 5 moss, P3 (K2 P2)3 times, K2, P3, 5 moss
ROWS 34,36,38,40,42,44: 5 moss, K3, P2 (K2 P2)3times, K3 5 moss

CABLE PATTERN: 
ROWS 1,3,5,7,9,11,13,15,17: (K2P2)3 times, K2
ROWS 2,4,6,8,10,12,14,16,18: P2 (K2P2)3 times
ROW 19: C14F
ROW 20: P14
ROWS 21,23,25,27,29: K14
ROWS 22,24,26,28,30: P14
ROWS 31: C14F
ROWS 32: P2 K2 P2 K2 P2 K2 P2
ROWS 33,35,37,39,41,43: (K2 P2)3 times, K2
ROWS 34,36,38,40,42,44: P2 (K2 P2)3times

Hope you give it a try!
Heather


Wednesday, October 29, 2008

Easy Neck Warmer - 2 toned


Pooch Neck Warmer


Very easy stitch pattern to follow for 18 inches. Only have to cast on 22 stitches.
Very much a beginner pattern made flat. 10.5 needle size used. When done all you have to do is sew the ends togethor and you have your neck warmer.

I used Garter Stitch for this neck warmer. So you can either knit every row or purl every row.

Thanks for visiting
Heather

Monday, October 6, 2008

Fabric Stitch Arm Warmer


    Beginner Fabric Stitch Knit Arm Warmer - Free


This is a great beginner arm warmer to try because it uses Knit and Purl stitches only, unlike my cabled.  Even if you're experienced at knitting it is a great pattern to try

If you're looking for a challenge you can try these Cabled Arm Warmers. They include Serpentine Cable Arm Warmer, Soft Cabled Arm Warmer, "Warm Me Up" Braid Cable, Waves Arm Warmer, Slow and Easy Cabled Arm Warmer and more.
It's made flat and then the sides are sewn together.


CO: 24
Yar: Caron 1 Pound
Needle Size: US 11
Rows Completed: 49 rows
Size: 6 x 9 inches
Amount of Yarn: 60 yards for both

ABBREVIATIONS:
WYIF = With Yarn in Front (as if to purl)
S1 = Slip 1 stitch
* *= Repeat the instructions between them

PATTERN:

It calls for an even amount of stitches

Row 1: *K1, WYIF S1* end with K2
Rows 2 & 4: Purl
Row 3: K2 *WYIF S1, K1*


FINISHING
  1. It’s important to do a loose bind off or it will squeeze your hand/arm. That's not to comfortable, trust me. I've made that mistake a couple of times.
  2. I always do a purl bind off no matter what stitch the last row is comprised of. It's so much more attractive then a knitted one. It's up to you.
  1. When you end your last row cut your yarn and leave a tail. You will tie a knot to secure the sewing and then you can weave it in.


Sewing your arm warmer together

If you have your own method of sewing by all means do that. If you need instructions then I can tell you how to sew it together.

Place the arm warmer with the right side facing down. Then take the sides and fold them in ward. Pin the top of it as you're working.

  1. Now thread your yarn needle.
  1. Start sewing by threading your needle through the purl bump closest to the edge then put your needle through the purl bump closest to the edge on the opposite side. Pull the yarn through leaving about 4 inches and tie a loose knot (so it doesn't squeeze your wrist). Then tie another knot tightly to secure the first one.
  1. Now, whatever side your yarn needle is on, **go up a little and put your yarn needle through the purl bump closest to the edge and go straight across to the other side and do the same.** repeat the instructions between the asterisks. The diagram shows how to do it.
  2. Pull tight every couple of inches.

      5. You can also pin where the thumb hole is going to be, if you want one. To do that lay it flat and slip your hand in it just like you would when wearing it. Use 2 safety pins where you want the beginning and end to be. When you get to the 1st safety pin weave the yarn into the sides until you get to the top pin and continue sewing again.

When you get to the very top do the last stitch and pull it tight, but not so tight that it hurts your arm, and tie a knot if you have a tail from when you finish your warmer.


Hope you try it sometime. Let me know if you have any questions.


Thanks!!
Heather


Monday, September 22, 2008

Easy Cabled Arm Warmer #8


CABLED ARM WARMER- KNITTED FLAT
This is a great easy cable pattern. Great for a beginner knitter. It's a breeze for the advanced knitters. Made Flat. The cable pattern was created by http://www.ravelry.com/patterns/library/cabled-fingerless-gloves-5

It's definitely a favorite of mine. I usually don't do other people's patterns because I like to make up my own but this one I had to do. I've never been able to find one that like. It's really pretty. Follow the link above.


Heather

Thursday, September 18, 2008

Honeycomb Cabled Arm Warmer


HoneyComb Knitted Arm Warmer


$3.00

This is a knitted Honeycomb cabled arm warmer. This is a cable pattern that is good for a beginner. It’s a basic cable. The only difference with my other cable arm warmers is that you are using the cable 2 times back-to-back within the row. Cables are only in two out of every 8 rows and I only completed 44 rows for the length you see in the purple example. I did 1 more honeycomb on the tan one. All the stats below are for the purple. The underside is explained under the Pattern Heading but you can see a photo of it at the end of this PDF. To increase the size see instructions above row 1.

Cable Videos to help you out if needed.: 
Left Cross: http://www.youtube.com/watch?v=YZYKWm0JtEI
Right Cross:http://www.youtube.com/watch?v=xxulTZA1cLA

TIPS:
If you're new to knitting cables and you need some advice on the needle to use. I don’t use the cable needles you see in stores. That’s because I have never found a straight one. What I use is a blue “yarn needle” that is sold in just about every store. Another reason why I use it is because it’s not metal which can cause the stitches to slip right off. When I use the plastic kind I have no problems. Those stitches don’t more. So I guess I’m glad they don’t sell straight ones because I would never use it. Stitches need to stay on not slip off.

Another tip……When doing cables I only use circular needles. This way the when working with the cable needle I don’t have to worry about the left knitting needle falling down,  It's hard to keep everything in place with straight needed. When using circulars everything is connected. That's just my opinion if straight needles work for you by all means use them.

Finishing Instructions along with sewing instructions will be included. This technique is an option for you....


Needle Size: 10.5
CO: 30
Rows: 44
Yards needed: Approx. 65-75 yards
Finished Size: 7 inch tall 6.5 inch wide
Gauge:4.62 stitches per inch and 6.2 rows per inch
Made Flat Not in the Round

ABBREVIATIONS:
WYIB S1 =With yarn in back (as if to knit) Slip 1 (as if to purl)
LC= Left Cross cable, Slip 2 to cable needle and hold in front, K2 then K2 from cable needle
RC= Right Cross cable, Slip 2 to cable needle and hold in back, K2 then K2 from cable needle
--------------------------------------------------------------------------------------------------------------------------

Tto Purchase this Arm Warmer Pattern:
http://www.ravelry.com/patterns/library/honeycomb-cabled-winter-arm-warmer
You can purchase this pattern by going to the link above. It will take you to Ravelry.com. Don't worry you don't have to be a member to purchase it. It will go through Paypal.
Also, you can click the "Buy Now" link below. Please do not distribute this pattern to the public.


If you have any problems going through the link you can let me know by leaving a comment.
Thanks,
Heather

Sunday, September 7, 2008

Pattern Generator for Arm/Wrist Warmers

I just found a website that has a pattern generator for making a wrist or arm warmer. Just go to this website: http://www.knittingnewscast.com/knc/Patterns/Generators/WristWarmers.aspx
Just enter your wrist measurment, gauge, and needle size.

Friday, September 5, 2008

#3 Big & Little Cabled Rectangle


This is #3 Big and Little Cabled Stitch pattern

6 x 9 inches
I would suggest this as a beginner cable pattern. You only have to use the cable needle 5 times in 52 rows. This was the first cable pattern I ever knitted. It's by far my favorite. I also used it in an arm warmer pattern below. Arm Warmer #1 in blue. CO is only 32 stitches. I used moss stitch on the outsides and reverse stockinette stitch in between the cables.

Abbreviations: 
CN = Cable Needle
C8F (Row 9) = Slip 4 sts to CN and hold in front, then K4 from cable needle
C8B (Row 15) = Slip 4 sts, to CN and hold in back, then K3 P1 then P1K3 from cable needle

Needle Size: 10.5
CO 31
Yarn used: Caron 1 pound Tan


PATTERN:

(RS)Row 1,3,5,7: Moss 5, K3, P2, K3, P5, K3, P2, K3 , Moss 5

(WS)Row 2,4,6,812: Moss 5, P3, K2, P3, K5, P3, K2, P3, Moss 5

Row 9: Moss 5 , C8F, P5, C8F, Moss 5

Row 10,12,14: Moss 5, P8, K5, P8, Moss 5

Row 11,13: Moss 5, K8, P5, K8, Moss 5

Row 15: Moss 5, C8B, P5, LC8, Moss 5

Row 16: Moss 5, P3, K2, P3, K5, P3, K2, P3, Moss 5

Row 17,19,21,23,25: Moss 5, K3, P2, K3, P5, K3, P2, K3, Moss 5


Row 18,20,22,24,26: P5, P3, K2, P3, K5, P3, K2, P3, P5


Friday, August 29, 2008

Beginner Arm Warmer #6 Baby Blue


Baby Blue Knitted Arm Warmer Pattern

This arm warmer pattern is great for a beginner knitter because you only use the cable needle one time. Use a nice soft yarn so your skin doesn't get irritated.  Give it a try!

Instructions Here

If you have any questions on the pattern  please let me know!

Heather

Tuesday, August 26, 2008

Silky Purple Arm Warmer #4


This is my Silky Purple Arm Warmer pattern. It's beautiful cable pattern. It’s repeated twice as you can see in the photographs. The underside is knit with, what I call, a slip stitch ribbing. It make it really strong and holds the arm warmer in place. I have a 6 inch wrist so I made the width 6 1/2 inches.

Remember to do a loose bind off otherwise it can be tight enough to cut the circulation off in your arm. I used Vanna White yarn. Only 1 skein is needed for the pair


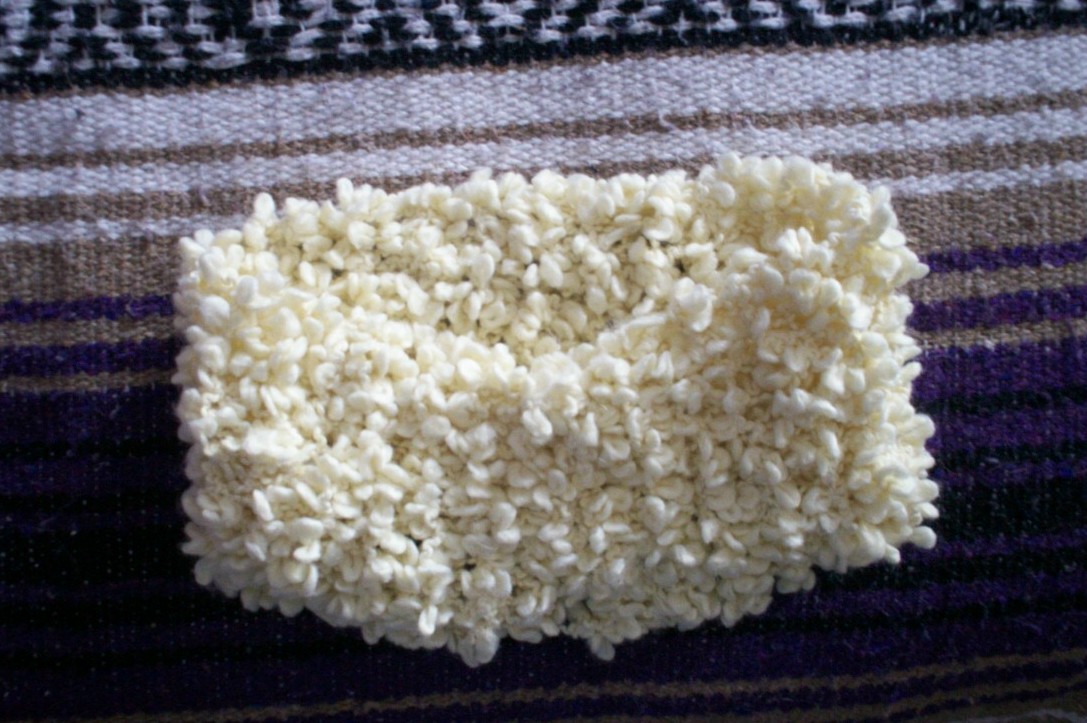
This is a beautiful cable pattern. Its repeated twice as you can see in the photographs. The underside is knit with, what I call, a slip stitch ribbing. It gives it extra strength in my opinion. Better than regular ribbing. The cable pattern is used on 14 sts.
If you wish to change to regular ribbing, or another design, I will post the instructions for the cable pattern itself after MY pattern on Page 3.
CO: 30 Approx. 65 yards of yarn
Yarn: Vanna White, Eggplant (purple)
Finished Size: 9 x 6.5inches
56 rows completed
Abbreviations:
WYIB = With Yarn in Back (as if to knit)
S1 = Slip 1 (as if to purl) { } = Cable Pattern
CN = Cable Needle
Supplies Needed: Cable Needle of your choose 1 Pair of knitting needles 10.5
PATTERN:
Row 1: P1,(WYIB S1 P1)x5 , P1, K6, P2, (WYIB S1 P1)x5

Row 2: P10, K2, P6, K1, P10, K1

Row 3, 27, 51: P1,(WYIB S1 P1)x5, P1, RightCross, Slip 3 stitches, hold in back, Knit 3, then K3 from CN, P2, (WYIB S1 P1)x5

Row 4, 28, 52: P10, K2, P6, K1, P10, K1

Row 5, 29, 53: P1,(WYIB S1 P1)x5, P1, K6, P2, (WYIB S1 P1)x5

Row 6, 30, 54: P10, K2, P6 K1, P10,K1

Row 7, 31, 55: P1,(WYIB S1 P1)x5, P1, K6, P2,(WYIB S1 P1)x5

Row 8, 32, 56: P10, K2, P6 K1, P10,K1

Row 9,33: P1,(WYIB S1 P1)x5 , P1,RightCross, Slip 3 stitches, hold in back, Knit 3, then K3 from CN, P2, (WYIB S1 P1)x5

Row 10,34: P10, K2, P6 K1, P10,K1

Row 11,35: P1,(WYIB S1 P1)x5, RightCross, Slip 1 stitch and hold in back, Knit 3 sts then P1 from the CN, LeftCross, S3 and hold in front, P1 then K3 from CN

Row 12,36: P10, K1, P3, K2, P13, K1

Row 13,15,17,19,21,23,37,39,41,43,45,47: P1,(WYIB S1 P1)x5, K3, P2, K3, P1,(WYIB S1 P1)x5

Row 14,16,18,20,22,24,38,40,42,44,46: P10, K1, P3, K2, P13, K1 +

Row 25,49: P1,(WYIB S1 P1)x5, LeftCross, S3 hold in front, P1 then K3 from CN, RightCross, S1 and hold in back, K3 then P1 from CN ,(WYIB S1 P1)x5

Row 26,50: P10, K2, P6, K1, P10, K1


Sewing the arm warmer by bringing the 2 sides together and sewing them. Leave enough yarn at the beginning and end to weave in the tails.

Monday, August 25, 2008

Slow and Easy Cable (Arm Warmer #2)


$3.00


This is one of my favorite arm warmer cable patterns. It has a consistent pattern which is nice because you can stop the arm warmer at any height and it won't look like you interrupted the pattern in any way.

The underside is made up of a slip stitch pattern. That makes it more durable. You can take it off and on and it won't stretch out. It's tight but comfortable at the same time.

It's great for a beginner. Cables are the first thing I dove into when I learned how to do the basics. You're doing the same cable so it won't confuse you if you are new to this kind of design.

**********
Tips:
I don't use the cable needles you see in stores. There are a couple of reasons. I've never found a straight one. What I use is a blue yarn needle that is sold in just about every store. If you were to use a straight metal yarn needle the stitches would fall right off. When I use the plastic kind I have no problems. They do sell the metal cable needles that look like wings and a hook. I can't hold them properly and they get caught on the yarn. Find what works best for you.

Also.....when doing cables I only use circular needles. This way the when working with the cable needle I don’t have to worry about the left knitting needle falling down,  It's hard to keep everything in place with straight needed. When using circulars everything is connected. That's just my opinion if straight needles work for you by all means use them.

**********

 Here is some of the information on the pattern so you have an idea of what to expect.


Made Flat, not in the round
Skill Level: Beginner with knowledge of Cables
Yarn: Caron 1 pound - Sky Blue
Finished Size: 9 inch tall by 7 inches wide.
CO: 29
Rows: 40
Amount of Yarn Needed: 60 yards approx for the pair
Needle Size: US 11
Gauge: 4.5 sts and 2.75 rows = 1 inches

ABBREVIATIONS:
C4B = Slip 1 to cable needle, K3 then K1 from cable needle
WYIB = With Yarn in Back, as if to knit
S1= Slip 1, as if to purl


Right Cross Video if needed
:http://www.youtube.com/watch?v=xxulTZA1cLA

**********
.
2 ways to purchase the pattern:
http://www.ravelry.com/patterns/library/slow-and-easy-cabled-arm-warmer
You can purchase this pattern by going to the link above. It will take you to Ravelry.com. Don't worry you don't have to be a member to purchase it. It will go through Paypal.
Also, you can click the "Buy Now" link below. Please do not distribute this pattern to the public.


Thanks for visiting!
Heather

3 Strand Cable Stitch Pattern

3 Strand Cable Stitch Pattern with Garter St. border
You can use this stitch border to create a number of items. I'm using this for a blanket. You can create a scarf etc..... You only have to cast on 30 stitches. I used Caron 1 pound Worsted Weight Yarn. I used US 10.5 needles. It measures 6 x 9 inches.
Download the PDF with instructions at:  http://www.mediafire.com/?qo9fsa8kaee5wf1
Link Fixed 3/24/12
Thanks
Heather

Saturday, August 23, 2008

Soft cabled Arm Warmer #1


SOFT CABLED ARM WARMER

$3.00

This is a great knitted arm warmer to make. This was the first one I made. It's an elegant cable pattern.  You are only using the cable needle 2 times in every row repeat. It's definitely something a beginner can do easily.

The underside, as you can see above on the sides, is a slip stitch pattern that makes it very comfortable and durable. You can go in and out of it without stretching it out. It's like having comfortable elastic. Definitely cozy warm AND it won't move around on your while wearing it.


I wanted to give you some tips along with some information that you will see if you purchase the pattern. I don't want you to go in blind sort of speak. At least this way you have an idea of what the pattern may be.

TIPS
If you're new to knitting cables and you need some advice on the needle to use....I don't use the cable needles you see in stores. There are a couple of reasons. I've never found a straight one. What I use is a blue yarn needle that is sold in just about every store. If you were to use a straight metal yarn needle the stitches would fall right off. When I use the plastic kind I have no problems. They do sell the metal cable needles that look like wings and a hook. I can't hold them properly and they get caught on the yarn. Find what works best for you.


Another tip……When doing cables I only use circular needles. This way the when working with the cable needle I don’t have to worry about the left knitting needle falling down,  It's hard to keep everything in place with straight needed. When using circulars everything is connected. That's just my opinion if straight needles work for you by all means use them.

This pattern is made flat, not in the round. Sewing instructions included. I do have a diagram of a possible sewing technique. See below.


Further information....
CO: 29
Yards Used: approx. 70 yards
Finished Size: 6 inches wide by 8 inches high (but can easily make it longer or shorter)
Needle Size: 10.5 US
Yarn used: Utopia or any soft worsted weight yarn needed
Gauge: 4.75 stitches per inch

Rows: Do 1-26 then do rows 5-26 until you reach your desired length.

Cable Videos to help you out if needed.: 
Left Cross: http://www.youtube.com/watch?v=YZYKWm0JtEI
Right Cross:http://www.youtube.com/watch?v=xxulTZA1cLA

******************************************

To Purchase this Arm Warmer Pattern:
http://www.ravelry.com/patterns/library/soft-cabled-arm-warmer
You can purchase this pattern by going to the link above. It will take you to Ravelry.com. Don't worry you don't have to be a member to purchase it. It will go through Paypal. Please do not distribute this pattern to the public.


Thanks!
Heather

Simple Split Granite Arm Warmer


Vanna White Purple Speckled Yarn

This is a great knit arm warmer pattern for a beginner and it's a quick project. It only uses knits and purls to create it. You're repeating rows 1-12 but I wrote out the row numbers. You can make it as long as you would like.  You're basically making a 

I usually add 1/2 inch to the measurement of the wrist this is going to be on. I have a 6 inch wrist so I make mine 6 1/2 inches.

IF you're are is
Thumb hole? Yes, see sewing instructions
Yarn Used: Caron One Pound Worsted Weight, Blue or
Vanna White yarn, Purple Mist
CO: 23 or any odd number of stitches
Rows Completed: 54
Finished Size: 6 x 9 inches
Needle Size: 10.5
Made: Flat

Abbreviations:
WYIB = With yarn in back (as if to knit)
S1 = Slip 1 stitch as if to purl
* * = Repeat the instructions between * and  *

PATTERN:
Like I said at the beginning of my post that you are repeating rows 1-12. But I wrote them out in case you want to cross off the rows as you go along.

Rows 1,3,5,13,15,17,25,27,29,37,39,41,49,51,53:
P1,(WYIB , S1, P1) x 11

Rows 2-54 and all even rows: Purl all stitches

Rows 7,9,11,19,21,23,31,33,35,43,45,47:
P2,(WYIB , S1, P1) x 11 End last repeat with P2


FINISHING
  1. It’s important to do a loose bind off or it will squeeze your hand/arm. That's not to comfortable, trust me. I've made that mistake a couple of times.
  2. I always do a purl bind off no matter what stitch the last row is comprised of. It's so much more attractive then a knitted one. It's up to you.. Do what you want.
  1. When you end your last row cut your yarn and leave a tail. You will tie a knot to secure the sewing and then you can weave it in.


Sewing your arm warmer together

If you have your own method of sewing by all means do that. If you need instructions then I can tell you how to sew it together.

Place the arm warmer with the right side facing down. Then take the sides and fold them in ward. Pin the top of it as you're working.

  1. Now thread your yarn needle.
  1. Start sewing by threading your needle through the purl bump closest to the edge then put your needle through the purl bump closest to the edge on the opposite side. Pull the yarn through leaving about 4 inches and tie a loose knot (so it doesn't squeeze your wrist). Then tie another knot tightly to secure the first one.
  1. Now, whatever side your yarn needle is on, **go up a little and put your yarn needle through the purl bump closest to the edge and go straight across to the other side and do the same.** repeat the instructions between the asterisks. The diagram shows how to do it.
  2. Pull tight every couple of inches.

5. You can also pin where the thumb hole is going to be, if you want one. To do that lay it flat and slip your hand in it just like you would when wearing it. Use 2 safety pins where you want the beginning and end to be. When you get to the 1st safety pin weave the yarn into the sides until you get to the top pin and continue sewing again.

When you get to the very top do the last stitch and pull it tight (but not to tight) and tie a knot if you have a tail from when you finish your warmer.

If you ever have any questions please leave a comment on this post.

Thanks!!
Heather


Wednesday, January 30, 2008

Sea Blue Bamboo Arm Warmer


Sea Blue Bamboo Arm Warmer

I used Bamboo Yarn by Hobby Lobby to create this very soft and comfortable arm warmer. It can't get any easier than this. It's definitely a beginner knit pattern. I did moss stitch at the beginning and the end (variegated yarn) and stockinette stitch in between using the solid colored yarn

. I used a 10.5 to make this. It measures 6 1/2 by 9 1/2 perfect for a 6 inch wrist. mboo armI used 60 yards to create them. The skein comes with 148 yards.